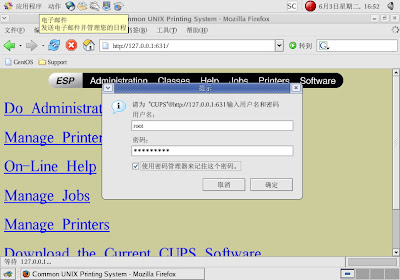
首先操作系统已经默认安装了CUPS打印管理系统,我们只需要在linux本机x-windows中使用firefox打开http://127.0.0.1:631的地址,点击“Administrator”会弹出登录窗体,请正确输入用户名root及其密码。
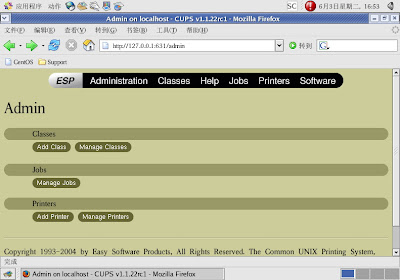
登录成功,跳入Admin页面。点击“Printers - Add Printer”来增加打印机。
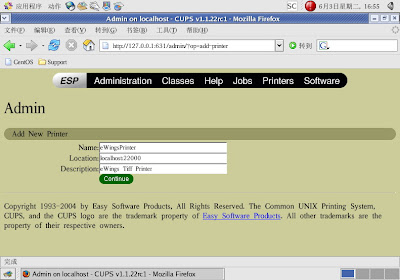
在这一步请按照图中所示填写打印机的基本属性。
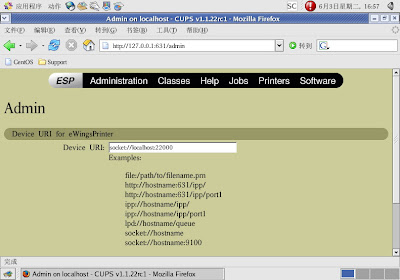
选择“AppSocket/HP JetDirect”作为Device。

Device URI填写“socket://localhost:22000”。
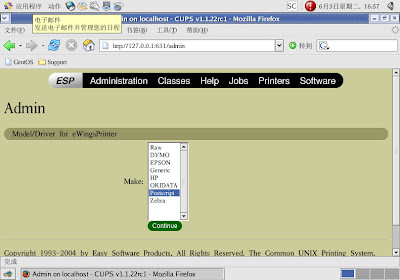
“Postscript” as Make。
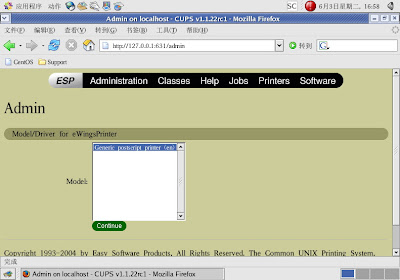
“Generic postscript printer (en)” as Model。
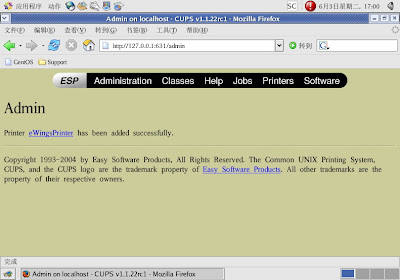
OK,打印机安装成功。
FYI:
- linux系列教育之CentOS安装篇 作者:大笨熊 2008-05-26 17:52:50


没有评论 :
发表评论